Tips to polish (DIY) the gold part on the 2tone submariner?
Nav Ad Widget - Mobile
Collapse
Nav Ad Widget - Desktop
Collapse
Announcement
Collapse
No announcement yet.
How to polish the gold on the 2-tone submariner?
Collapse
X
-
don't polish if possible. DIY job will never get the real mirror finish without the proper material and equipment.
if have to can take this suggestion:
Removing Scratches From The Polished Center LinkAnyone who owns a Rolex with an Oyster bracelet that has polished center links (like the three I own – the two-tone Submariner, Yacht-Master, and Daytona) knows how readily the center link shows scratches. In fact, many people shy away from buying a Rolex with polished center links for fear of scratching them up. Well, I’m hear to tell you that it’s a very simple matter to polish the center links on an Oyster bracelet, and can be done in very little time. In fact, using the techniques in the following tutorial, you’ll be able to effectively remove all but the deepest of scratches from your polished Oyster links.
Of A Rolex Oyster Bracelet
By: John B. Holbrook, II
March 19th, 2006
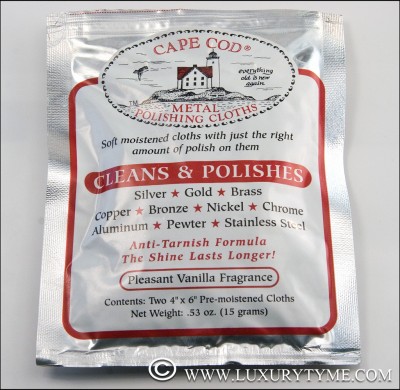
There are probably several products on the market that are useful in removing scratches from a polished surface, but I’ve had excellent results using Cape Cod Polishing Cloths. They are simple to use, work on both stainless steel and gold surfaces, and are very inexpensive – the package pictured below cost less than $10.00:
Here’s what the cloths themselves look like – in this photo, you’ll see one that’s outside the wrapper that I’ve used several times over a year (they are reusable) and one that’s still in the wrapper that I’ve not yet used.
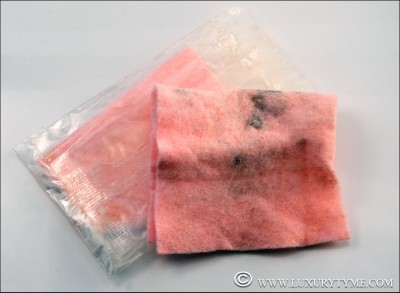
The cloth itself has a very fine, rough texture – somewhat like very fine steel wool. It also is well soaked with a polishing liquid that has a rather strong vanilla aroma. When you’re using the cloth, it’s very important to understand that you only want to use the cloth on the polished portion of the Oyster bracelet. If you use the cloth on the outer links of an Oyster bracelet, the brushed finish will be changed to a polished one. With this in mind, one of the techniques I’ve developed to be more precise when using a Cape Cod Cloth on my Oyster bracelet is to wrap the cloth around the head of a Q-Tip (pictured below):
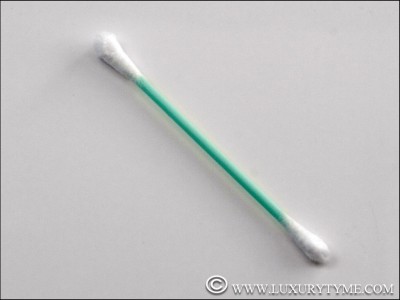
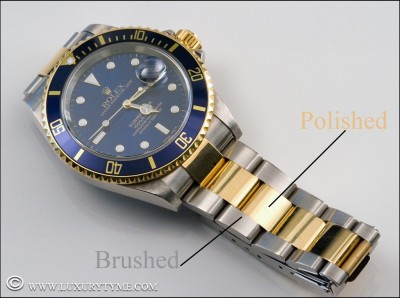
With the Cape Cod cloth wrapped around the Q-Tip, I can hold it like a pencil, and it’s easier to polish the center link without accidentally polishing the brushed outer links. In the photo of my two-tone Submariner below, you can see which part of the bracelet is polished, and which part is brushed. Again, you only want to use the Cape Cod cloths on polished surfaces:
Now, armed with your Cape Cod cloth wrapped in a Q-Tip, you’re ready to begin actually polishing the center links. When you do the actual polishing, it’s very important to use very careful, deliberate strokes that go with the grain of the metal. Go very slowly – especially your first time out. DO NOT use a circular or cross stroke, and apply only a modest amount of pressure. The following close up photo demonstrates the direction you should use. If you look closely at the brushed links on either side of the polished link, you can actually see the grain of the metal. You want to use brush strokes that go with the grain of the metal, not against. With most hair line scratches, it should only be necessary to polish for about a minute before you’ll begin to notice the scratch has disappeared. Deeper scratches may however take longer.
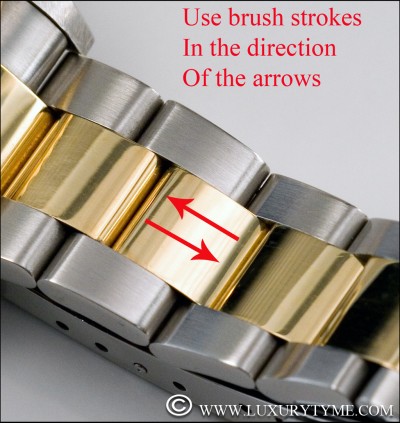
The other thing to keep in mind when you use the Cape Cod cloth is, you don’t need to polish the entire bracelet – only polish areas with visible scratches. Why? What you’re actually doing when you’re polishing with the Cape Cod cloth is removing metal from the bracelet. A scratch represents a very, very small indentation in the level, polished surface of the bracelet. By polishing it, you’re essentially re-leveling the surface, so the indented portion, or the “scratch” is no longer visible relative to the rest of the surface. So while you could literally polish your bracelet scores, if not hundreds of times without removing enough metal to do any real, noticeable damage, there’s no sense in polishing any portion of the bracelet that isn’t scratched.
I use the above illustrated Cape Cod polishing procedure on my Rolex watches with polished center links once every 3-4 months and it keeps them looking like brand new. The Submariner in the above photos is well over a year old and is worn by me 2-3 times per week, and I didn’t even polish it prior to taking the photos for this article.
Certainly the same product and techniques here could be used for non-Rolex watches, however, I do not recommend using Cape Cod cloths on gold plated surfaces.Audemars Piguet Ball Bell&Ross Cartier IWC Longines Omega Panerai Rolex Sinn Tissot
Alba Casio Citizen Roox Seiko
Wanted to add PP but bo lui
-
for me; dont polish. learn to live with the light scratches until servicing, and even then; if it is a daily wearer; you will forever be thinking about scratches because it is inevitable.[U]Currently wearing[/U]:
[SIZE="1"]TT Datejust with diamond dial - sold!
Blue 6694
Seiko SD-lookalike[/SIZE]
[U]"My collection"[/U]:
[SIZE="1"]Blue 6694; TT DJ w diamond dial.[/SIZE]
Comment
-
brush finish is very tricky to do. can use scotch pad, steel wool, scratch pen, abrasive pad etc...
but no way to know if it will match the original brush finish unless you try. also if hand not stable, the line will not be parallel.Audemars Piguet Ball Bell&Ross Cartier IWC Longines Omega Panerai Rolex Sinn Tissot
Alba Casio Citizen Roox Seiko
Wanted to add PP but bo lui
Comment
-
don't do it. you won't like your DIY result! plus, to polish it, you'll have to remove (traces of) gold from the watch...Originally posted by chengzsg View PostTips to polish (DIY) the gold part on the 2tone submariner?“Watches, no matter how much they cost, are better at telling time than making a person happy.†- Thomas J. Stanley
Comment
Footer Ad Widget - Desktop
Collapse
Footer Ad Widget - Mobile
Collapse

Comment